
Creating a CTA bus tracker with go
Published:
The source code for this post is available on my github.
This post describes creating a simple bus tracker using Go, JavaScript, and MongoDB. I chose Go for this project for two reasons: (1) I wanted to learn it, and (2) Go is great for making razor-thin HTTP servers and I wanted to make something with minimal dependencies.
The Chicago Transit Authority (CTA) has a reasonably robust API for tracking buses (and trains and stuff). API calls are authenticated by an API key, which you have to request manually through a form. They sent me one about an hour after I asked for it.
For this project I made two different user interfaces. The first, which I’ll call UI A, copies the style of many existing bus trackers, including the CTA’s own. You select a route, then a direction, then a stop. The app then displays estimated arrival times at that stop. The other UI, UI B, uses a search bar to match stop descriptions. You click on the stop of your choice and a list of predicted arrival times populates next to it.
They look like this:
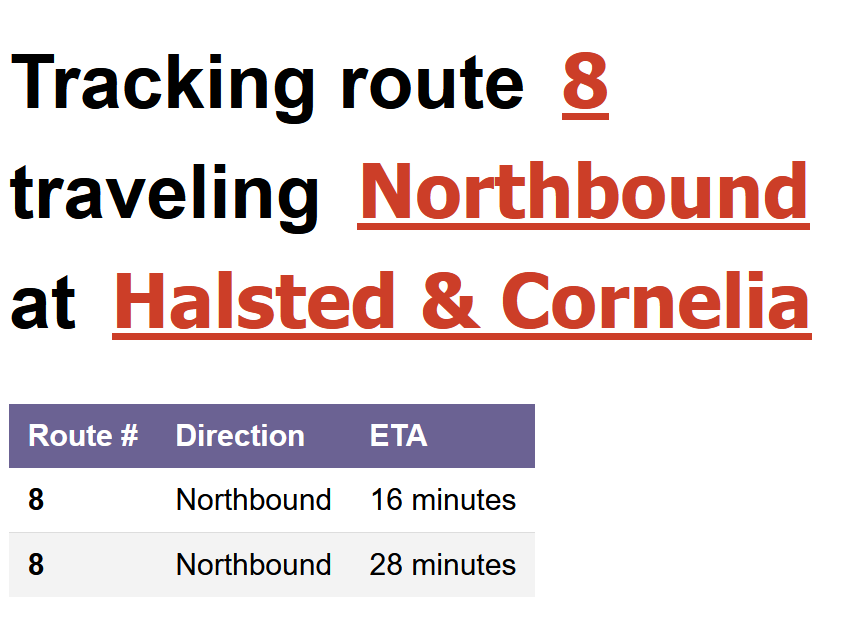 UI A
UI A
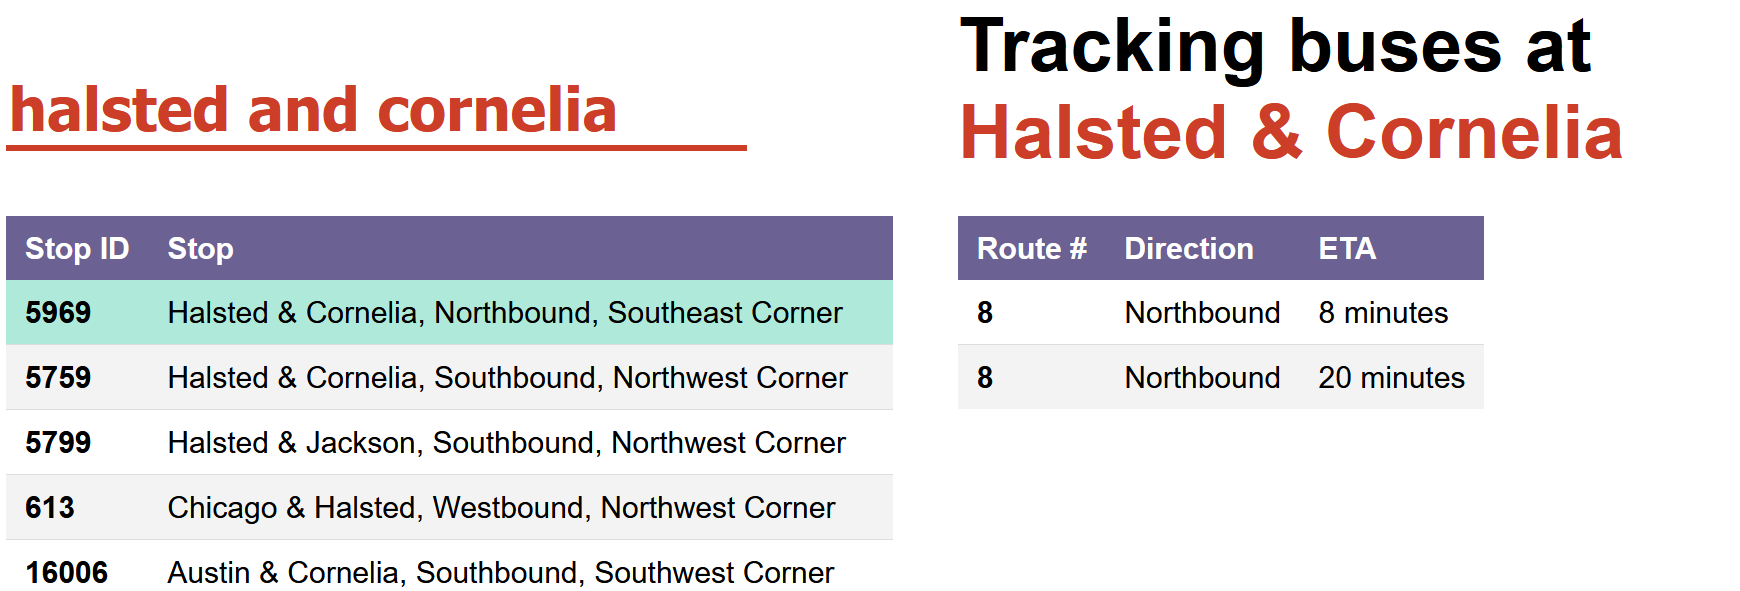 UI B
UI B
You can try them on my heroku demo page: UI A UI B
Building the HTTP server
Making an HTTP server in Go is ridiculously easy. Because my muxing needs were minimal, I used the built-in ServeMux. Here’s the entirety of the server code
package main

import (
	"fmt"
	"log"
	"net/http"
)

func main() {
	mux := http.NewServeMux()
	config := readConfig()

	// create the request handlers
	ctah := ctaReqHandler{config: &config }
	mongoh := mongoSearchHandler{config: &config}
	staticFileServer := http.FileServer(http.Dir("static"))

	mux.Handle("/getCTAData", ctah)
	mux.Handle("/search", mongoh)
	mux.Handle("/", staticFileServer)

	listenAt := fmt.Sprintf(":%d", config.port)
	log.Printf("Open the following URL in the browser: http://localhost:%d\n", config.port)
	log.Fatal(http.ListenAndServe(listenAt, mux))
}
Of course, there’s some code for the two different request handlers too.
Building UI A
To build UI A, it’s a little static HTML/JavaScript and some HTTP methods. Basically, there’s a generic fetch request maker called postRequest (because I’ll only be making POST queries to the server). A POST request is then made by a function like
async function getDirections(routeID) {
    let postData = {
        reqType: "getdirections",
        rt: routeID
    };
    let ctaResponse = await postRequest("/getCTAData", postData);
    let directions = ctaResponse["bustime-response"].directions;
    console.log(directions);
    updateDirections(directions);
}
The above sends two pieces of data to the server: a reqType denoting the request type, and the data required to make that request. In this case, it’s asking the server to provide the directions of travel of a given route, where the route is specified by a routeID. This is handled on the Go server by converting the request into something understandable by the CTA API:
func ctaGetRequest(ctaResponse chan<- map[string]interface{}, args CTAPostRequest, config *configSettings) {
	// ...
	// format the correct URL
	getUrl := fmt.Sprintf("http://ctabustracker.com/bustime/api/v2/%s?key=%s%s&format=json", args.ReqType, config.apiKey, affix)
	// ...
	// read the response
	body, err := ioutil.ReadAll(resp.Body)
	if err != nil {
		log.Println(err)
	}
	// pass the response to the ctaResponse channel
	var jsonResponse map[string]interface{}
	json.Unmarshal(body, &jsonResponse)
	ctaResponse <- jsonResponse
}
This response then gets transmitted back to the JS frontend by the muxer.
Building UI B
I sort of prefer UI B, because in typical use cases for bus trackers, you already know the stop you want to track buses at. The reason UI A is popular in existing apps is that it cuts down on the amount of data the API needs to send you. There are over 11,000 CTA bus stops, but a given route will have fewer than 100 in either direction. On the other hand, this interface is unintuitive, particularly because you have to choose a direction which you may not even know. Finally, the bus stop names are alphabetized, but it’s hard to predict which cross street comes first. You may waste time looking for 56th St. & Hyde Park Blvd. when the stop is actually called Hyde Park Blvd. & 56th St. So a search bar makes sense.
Unfortunately, the CTA API doesn’t provide a way to make searches, so we have to do it on our own. Fortunately, they do provide “General Transit Feed Specification data,” which is freely available. The stops.txt file is a JSON-formatted file containing stop names, descriptions, ID numbers, etc. MongoDB was all too happy to import this file and so I ran an Atlas database with a “stops” collection containing all the stops data. I also added a text search to the database for all fields. Finally, I hooked up the HTTP server.
For this we need the MongoDB driver for Go, which is the only real dependency the app has. Once the user has typed at least 3 characters into the search bar (to limit the number of search results), the app makes the search request
	// formulate the search filter
	filter := bson.M{
		"$text": bson.M{
			"$search": queryString,
		},
	}
	// sort by "textScore"
	opts := options.Find().SetSort(bson.M{
		"score": bson.M{
			"$meta": "textScore",
		},
	})
	cursor, err := stopsCollection.Find(context.TODO(), filter, opts)
MongoDB then responds with a list of stops. Now when a user types in the search bar, an HTTP request is triggered, passing the text of their search as the queryString to the Go server. Go makes the above query through the Mongo driver, and then passes the results back to JavaScript through the HTTP response. JavaScript then draws those stops in a table. When a user clicks on a row, an HTTP request is made, reusing the code from UI A, to CTA API via the Go server.
A final note: to deploy this to Heroku, you have to give the app’s IP address access to Mongo. Unfortunately, you have to pay real money for static IP adresses, so as a workaround the database is open to all IP addresses. Probably not ideal from a security standpoint.